Showing posts with label handmade. Show all posts

Tuesday, September 23, 2014

Why I Switched to The Craft Star, and Why You Should Too

When I started out selling my jewelry online, I built my own website. But pretty soon I found Etsy, and I eventually let my site go in favor of selling on Etsy. It's a venue with 850,000 other crafters, and I thought there would be power in numbers. Apparently a lot of other sellers felt that way too.

I tried a couple of other sites: Ruby Lane had a creative branch, but I never had sales there. Same thing with Artfire. So it dwindled down to my Facebook page and Etsy.

Etsy has some rather serious pervasive problems. The company, for whatever reason doesn't seem to like sellers communicating too much with each other. They shut down the chat feature in 2011. They allow users to post on a public board, but randomly shut down the conversations. They don't allow disparaging remarks, which is apparently any question about the business or its practices.

Since shutting down chat, Etsy allows sellers to communicate, in a fashion through their BNS and BNRs. Those are not for explaining in detail in this article, but basically they’re about sellers selling products to each other and giving each other feedback. So it looks like you have sales. I did some number crunching and testing by going in them daily for a few months, then off for some months. I found no change in my sales or rank, except for one new team that asked members to ‘favorite’ each other’s items and the members, for whatever reason, actually did it. Like crazy. During that short (2 or 3 week) run I managed two random sales to buyers who found me without knowing me or being members of my TPJ Facebook page.

From the beginning, Etsy has touted itself, and become popular as a handcrafter’s venue. This page on Etsy explains the requirement for a seller: you must present supplies, vintage, or handmade items for sale. Yet the problem of finding resellers rather than handcrafters on Etsy continues to this day; they are often pointed out (by other sellers) and documented (because you can find their items on huge catalog sites at wholesale pricing). The company's sheer resistance to removing the resellers leave true crafters with a bad taste in their collective mouths, believing that for Etsy it's all about the money, not the rules. Not to mention that we can't compete. Why would you purchase my $35 hand beaded necklace when you can buy one from China for $9? 

In fact Etsy recently added a partnership level where the seller can outsource at least part of their work to a factory. As an aside, I found it quite humorous when I applied to do this with my t-shirt designs, and I was one of the ones flagged for 'proof' that I handmade the designs. My shirts are most clearly handiwork, probably not even saleable.(see them in this post) Yet perform nearly any search on Etsy and you will find hundreds of factory creations.

In 2013 I discovered The Craft Star (http://www.thecraftstar.com/). I felt like I had come home. At The Craft Star there are a few hundred sellers, but somehow the staff makes me feel like I am the chosen favorite. The owner, Bethan Davies, spends hours and hours every week finding new ways to promote us. She’s very transparent with her efforts, which not only informs but causes sellers to be extremely supportive.

"Buying from small businesses helps families directly." ----Bethan Davies, The Craft Star

The Craft Star features live shows on Monday and Thursday. They may be informational, educational, live sales or just fun. Sellers are mainly the attendees, and through our participation in the live shows we get to know one another.

There are Click to Buy videos, and videos that market products for the sellers right on the site. Here's an example:


All this works together to promote SMALL businesses --there are NO resellers at The Craft Star. We as sellers feel--and appreciate-- their 100% backing. And I love their last line:
"Please keep in mind, buying from small businesses helps families directly."

If you are a buyer and not a seller, all this may seem trite to you. But it's the difference between supporting small business and not. Etsy is a huge, multi-million dollar business. When you purchase (unknowingly, I realize) from their resellers you are perpetuating the lie. When you take your business to The Craft Star you know that you are buying from a small business.

I know this post sounds fairly salesy but I assure you it's not intentional. I simply love 'living' at The Craft Star. Find out for yourself. Become a member(it's free) and try out the forum and chat tools. You will find a helpful community -- no attitude; no bad vibes. When you're done, don’t forget to join us as a seller!


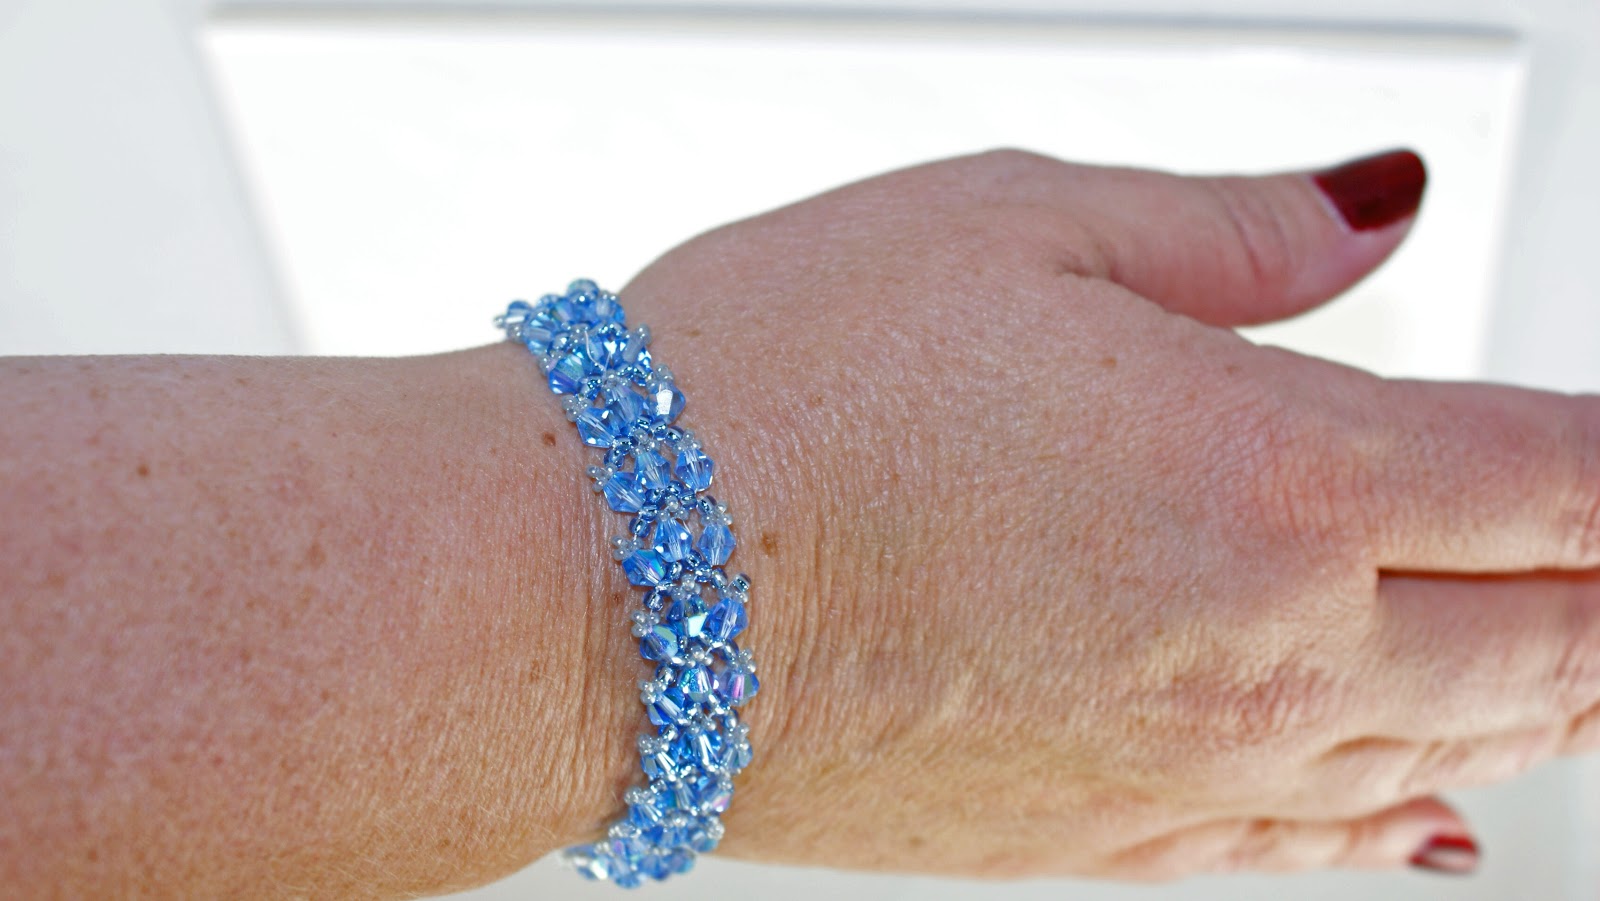
My Jewelry Shop at The Craft Star ThePerfectJewel4U

My Digital Design Shop at The Craft Star Digi Doodads


Monday, January 9, 2012

What I've been doing lately...

I have 3 projects I've been working on. One is an onyx piece that I"ve beaded around and now I'm making a necklace for it. I want this one to be a little different from my others so it's taking awhile. I also have an agate teardrop that I beaded around but haven't put the fringe on yet. You will see those in a few days. Then I got this book: It is so awesome. If you've read my posts, you know how I love beading beads. So I've done 2 so far. The first one looked like a blob. The 2nd was a little rounder but it seems....twisted at the ends or something. The book is wonderful, the instructions are clear. It's just operator error and NO you don't get to see them.

 In the interest of being more transparent (less private), I wanted to share my new Planted Tank blog with you. It's all about my aquarium. If you've never seen a planted tank you should google them. They're awesome and inspire all sorts of creativity.

I'm listening to the Beatles today. I downloaded their album "1." Very cool. What's even more fun? I know all the words. :)

Friday, December 23, 2011

What's new in the studio


This handmade beadwoven and gemstone necklace is my newest piece. I used agate and rose quartz first, weaving frames around them in colors that set off the stones. Then I created a necklace from seed beads and pearls, Czech glass beads, and more. When it was nearly done, I stitched the agate and quartz pieces into the piece. I then wove many more rows to hold them into the design. Fun! :D

It's for sale in my Ruby Plaza shop. Thanks for looking.


Thursday, December 22, 2011

Giving Away a Handmade Beaded Bracelet

Wow. My Facebook page is up to 100 fans. I'm thrilled!!!  I am going to give away a bracelet to celebrate. Not just any bracelet either - I wanted to pick a special one. This is a brand new bracelet. It hasn't been for sale in the online shop....I just got it made.  Because it's the holidays and I want to give everyone time to get in on the game, I'll keep this open for one week. Next Thursday is the drawing; here's what you need to do. Visit my shop's Facebook page and make a comment under the post about the giveaway. I'll use a random number generator to pick the post that wins.

Here's the bracelet:


It is made from Swarovski crystals in 2 shades -- green and clear. Thesilver-plated pewter clasp and the focal flower both have tiny crystals on them too. Please visit my page and enter the contest! :)


Friday, December 16, 2011

Holiday Email Overload

Do you have a holiday email overload, as I do? If you do a lot of online shopping, you'll automatically be put on  email lists. Work-at-home, self employed individuals have to really watch their time - - and checking email can take away a *lot* of time that could be used more productively.

I follow the Getting Things Done plan, so I have folders set up in my email to dump things into. I sort them into projects by title, someday/maybe, and Waiting on (something). But the onslaught of emails kills me; instead of having no new mail in the inbox, which would indicate that I'm caught up, there are 96 in one and 226 in the other right now. The sheer thought of it overwhelms me.
I think that my email box must be closely related to my snail mail, which also can get overwhelming in a hurry.
I used to only allow myself 15 minutes in the morning and 5 minutes in the evening to answer emails. That was in the olden days. Now that everyone uses email for everything, you can't even wade through the titles in 20 minutes. And I resent 30 minutes, twice a day because that's an hour I could be beading.
I do use gmail, which cuts down on spam; you simply don't have it in gmail. There's also a way in gmail to create filters; if Cousin Bob always forwards jokes, make a folder and label it Jokes. Set up a filter, and Bob's jokes will always land there, where you can browse them on Saturday afternoon.

Anyway. Here is an article that suggests some ways to prevent this overload issue. Give them a try and see if you can become more productive. Now -- I'm off to do some aggressive unsubscribing. :)

Tuesday, December 13, 2011

Craft Show Display

Thought you might like to see the photos from our show. It was not very successful (read: abysmal failure). BUT the 3 of us who did the table together came away feeling as if it was a great learning experience. There weren't that many visitors -- it had been moved from the original location, plus there was another big craft show nearby that day. We don't have control over any of that. We *might* have done better in the main room, rather than a side room... no control over that either.
Also we'd been told our booth was 10X10, so that's what we planned for. Ros and Ken brought the tables, Mickey and I brought the cloths, step shelf, and wire "walls". Mickey had even drawn a layout in some fancy computer program. So we get there, and the space is 9X12. Yikes! Our tables won't fit! We figured it out though, and the sponsors even made tables and chairs available to everyone. All in all it was great fun. There were 43 vendors all total.
Roslyn with her jewelry

This table is mostly mine, with Ken's wooden items on the left end.

A customer checks out our glass cases

Moi!

OK I'm not so photogenic.

Some of my multi-strand necklaces - $20 for 10 strands.

Tuesday, November 15, 2011

My jewelry show goals are killing me!


People are always asking me what my goals are. Since jewelry – making is something I’ve decided to keep as a HOBBY I try not to have any. But it’s so my nature to approach things like a business: what are your goals? What are the steps to achieve that goal? What are the sub-steps? What supplies do you need to make that happen? Aargh. I drive myself nuts.
This week I actually do have goals, and I’m not meeting them. I feel like there’s an interruption every 10 seconds. It doesn’t matter how important it is – it’s something that draws me away from my craft. And since I’m actually doing my first craft show this weekend, these goals are important. At least to me. J
The show is in Rogersville at the Armory on Saturday. It’s from 10-6. I’m sharing my booth with Roslyn, who is RazzleDazzleMe on etsy. So I emailed her today and said I have 200 pendants, about 100 other beaded pieces, and maybe 50 sets of earrings. And I told her how I feel so far behind. I could feel her laughing in her response: its plenty, don’t worry, we’ll have fun. And yes – we will. If I can just get those other 50 earrings made…….
Here are a few pieces I plan to take with me:


Thursday, November 10, 2011

Wednesday's Photos: Chalk Art

OK so I'm a day late posting :) This is chalk (sidewalk) art. I found the first few when I looked for Tampa, FL and their annual chalk art festival. Then I did a search for more. There's some r-e-a-l-l-y amazing chalk art out there. Take a look:


Artists, in order of pictures: Julian Beever (Muses and Coke), John Akers (heron), Ellen Reilley Marshall (cow), Mic Knight, and I believe the final close-up is also Mic Knight's. If you like those, you might also enjoy these spectacular 3-D works: http://www.tracyleestum.com/portfolio/3d-street-art


Sunday, October 30, 2011

New Glass Tile Pendant Kits

Hurray. I finally got my kits together for sale. I have pendant making kits with the round cabochons (like the Halloween ones, I'll post a few here ....). They're for sale. I've made both
regular style with various pretty papers, and
Christmas style with a red/green assortment. I'm posting listings for 2, 4, 6, and 10. What do you think? Is that enough, or too much? Should there be a kit for making 1? I'm trying them on both eBay and etsy.


The instructions for making the pendants are in a previous post, here, and I'm including bails and ball chains (and of course the glass cabochons) in the kits. For some reason it's taken weeks to get these together! I hope they work out.

Friday, October 28, 2011

Friday Finds

Today I've been making jewelry and playing on the Internet. :) I find the computer quite a distraction - tomorrow I think it gets moved to the floor while I bead, as there's less than 3 weeks to go until my first craft show.
So - I'd like to feature a lovely find every Friday. Here's one from a favorite shop on etsy. It's a set of hand blown glass beads. They're so organic, so nature-y. If I didn't have a whole cabinet full, I'd have already bought them:

The seller's name is MermaidGlass. (Click to see these and other scrumptious beads!)

Have a happy Friday!

Monday, September 12, 2011

Beaded Bead, Part 3

I finally got away from tile pendants (which are awfully fun) and ATCs (which are awfully addictive) and got back to beading. For this one, I purchased a pattern from JewelryTales at Artfire. The directions were blessedly clear, something I especially appreciate as I've been trying to follow so many bad ones lately!

Somewhere near the end of the bead, I panicked. It seemed that the last few rounds, which should outline the 4 pearls, were not going to outline them at all. I contacted the designer, who was very willing to help but didn't really understand the problem. Haha.


So I quit on it for awhile. Then I picked it up and looked one day, and said what if...... I just add in another bead or 2 in the bare spots, around the circle? So I tried it. Hooray! I'm so glad I did. The last two rounds, the ones that frame the pearls, make the whole bead tighter. It makes you able to see the crystals that are woven into the sides. I'm really excited with this one; it's the closest thing yet to a beaded bead that can take center stage. I've already started on the necklace it's going to hang on.......stay tuned.......

Friday, September 2, 2011

How to make a glass tile Pendant

I know there are already several tutorials out there showing how to make glass tile/scrabble tile pendants. I found them all lacking though; as I made my first ones, I had questions. So I'm going to show you "my way" of making them. Not necessarily THE way -- just a way. :D


First, you need a few supplies. Your glass tiles (I have some for sale on etsy, or you can even get them at Michael's).


Some glaze --try Judikins Diamond Glaze. It's great, inexpensive and readily available. For glue, try  E6000 (a jewelry glue you can find almost everywhere) or any old craft glue that you've already got. You'll need the pictures you want to put on your tile.... I buy mine from a favorite etsy friend but you can use just about any picture file, a part of a picture, or google "digital collage" and you'll find tons.


Here's my glaze (that's when I was using Sun and Moon glaze) and some other necessities: paper towels, a craft knife or razor blade for cutting out the picture, a straight pin (or you could use a paper clip) for when your glaze clogs up -- and it will. I also use a paint brush for spreading the glaze, though you don't have to. And I keep it all on a sheet of wax paper so things don't get stuck together. It's sort of a messy process.


Besides the picture I'm going to make into my pendant, I like to have a backing for the pendant. Sometimes I use a second copy of the same picture. Sometimes I just use craft or scrapbooking paper with a nice design.


It doesn't matter too much about the back, you're just giving it a finished look. (Or not!)


So the easiest way to make your pendant is to lay the picture down on the wax paper and pick up your glass tile. Wipe it off with a paper towel, then slowly turn your glaze upside down (the slowness helps prevent bubbles). Don't shake your bottle, like I did at first. You'll end up with a bubbled picture!


Put a thin layer of glaze on the tile -- the thinner the better. Using too much can make your picture become wavy, plus it runs down the sides, causing you more clean-up later. You're putting this layer on just the flat surface, the one that will touch the picture. Spread it around with a paint brush or (easier) just use the tip of the bottle. Wipe the tip often.


Once the glaze is coated on, flip the glass tile over and set it right on top of your picture, glaze side down. You might have to adjust it by moving it around some. I then press gently -- not hard -- if I can see any air bubbles. I find that, for me, this is what works. Otherwise the air bubble is there for life! Now let it dry for a couple hours.


When that layer is dry, you can add a backing if you like by glueing your backing paper on. Then trim around the whole thing with a knife or razor blade. It's easy enough just to hold it up and run carefully around the edge with the blade. There are lots of square and round punches that theoretically should cut the picture to the exact size of your glass -- trust me, save your money. You'll still have to do some trimming.


Now you have a decorated tile but no glaze on the back.


The next step is to lay the tile back down on your wax paper picture side up and use the brush (or the tip of the bottle) to spread glaze on the back. You are doing this layer to preserve the picture. Someone gave me a cute photo of my daughter once that wasn't preserved -- it ruined pretty quickly. So this step is important!


Be sure to use a thin layer, but spread it carefully where the edges of the picture meet the tile. You want to cover them well. If you're using a paint brush, you might have brush marks:
I've decided I don't care too much; the brush seems to really "get" the edges. Also, you're going to apply a 2nd coat so you can go the other direction, which tones it down a bit.


After you have done at least  2 coats on the back of your tile pendant, let it dry a good while, preferably overnight. Then pick it up and inspect it carefully. If any glue has dried in the wrong place, use your knife or razor blade to scrape it off. Then wipe again with a paper towel. 


Now you are ready to add the bail or the magnet. Bails are for necklaces - use the smallest size you can get away with. Magnets can be fun too. Here are some of my bails:


Taa-daaaah! You're done! Congratulations on making your first pendant. String it on a simple ball chain, a ribbon necklace, or a leather cord. 


Use the link to the right if you need to email me with questions. ;)